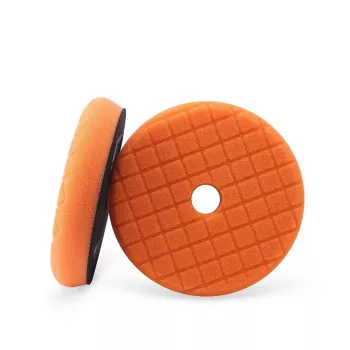
A heavy cut polishing pad is built for the first correction step: removing oxidation, sanding marks, water-spot etching, and deeper swirls so the surface can be refined afterward. An orange heavy cut foam pad is a popular choice because it delivers strong defect removal while keeping a more controlled feel than wool. Below is a practical guide to what this pad type does best, how to choose between 3″/5″/6″ sizes, and how to compound safely for consistent results. For more guidance, see Your favorite polishing pads and why?.
Heavy cut foam pads focus on correction work—think oxidation removal, moderate-to-heavier swirls, and compounding after wet sanding when you need measurable leveling. The foam is typically firmer and more “direct” than polishing or finishing foams, translating machine movement into cutting power while still providing a small amount of cushioning. For further reading, see Yellow vs Blue waffle Pads – Optimum Forum.
In a multi-step process, a heavy cut pad is usually step one. After defects are reduced, a polishing pad and then a finishing pad refine the surface for maximum gloss and clarity. While “orange foam” commonly signals a more aggressive cut level than soft black/blue finishing foams, the exact aggressiveness varies by manufacturer, so the smartest approach is always a small test spot before committing to the whole vehicle.
Pad size determines how easily you can keep the pad flat, how stable the machine feels on contours, and how quickly you can cover a panel. For most users, selecting the right diameter has more impact on the quality of the compounding stage than chasing higher machine speed.
Use 3″ pads for pillars, bumpers, mirror housings, tight curves, and spot repairs where accuracy matters more than raw coverage. They’re also helpful when working near edges and complex body lines because you can better manage contact and heat.
A 5″ heavy cut pad is the “do most of the car” size. It offers a balanced footprint—enough surface area to work efficiently on doors and fenders, while still staying stable on moderate curves.
On hoods, roofs, and other flatter panels, a 6″ pad can speed up your workflow. The tradeoff is that it can feel less stable on tight contours and requires more attention to keeping the pad flat to avoid edge loading.
Whatever size you choose, match the pad to the backing plate (generally the plate is slightly smaller than the pad). This helps protect edges and reduces the chance of strike-through and accidental scuffing when you tilt slightly during passes.
| Pad size | Best for | Typical tradeoff |
|---|---|---|
| 3″ | Tight areas, curved panels, spot correction | Slower on large panels |
| 5″ | Most body panels, balanced correction | May require multiple passes on heavy defects |
| 6″ | Large flat areas, quicker coverage | Less control on edges/curves |
For predictable results, start with the least aggressive combination that meets your goal. A compound paired with heavy cut foam is often enough to remove oxidation and moderate defects. If the paint is severely neglected, wool can cut faster, but heavy cut foam tends to offer better control and a lower risk of aggressive haze on many clear coats.
Modern low-dust compounds can cut hard with less mess, but pad cleanliness still dictates consistency. A loaded pad stops cutting efficiently, runs hotter, and can leave a duller finish that takes longer to polish out. If compounding haze shows up (especially on softer clears), plan a second step with a polishing pad and medium polish, then finish as needed for clarity.
For a flexible setup that covers spot work through full-panel correction, the 3″/5″/6″ Orange Heavy Cut Polishing Pad for Car Buffing and Compound Polishing lets you choose the diameter that matches the panel and your comfort level—3″ for tight contours, 5″ for general panels, and 6″ for large flat areas to move faster through compounding.
If you’re planning a larger tools-and-supplies refresh, the Shop Smart, Save Big This Prime Day | What to Buy on Amazon Prime Day Guide | Digital Download Checklist & eBook can help organize a shopping list for machines, pads, compounds, towels, and lighting so you don’t forget key items mid-project.
For deeper background on pads, abrasives, and technique, see guidance from established brands and educators like Meguiar’s and 3M Automotive Aftermarket.
Yes, when used correctly. Start with a test spot, keep the pad moving, manage heat on edges and body lines, and plan a follow-up polishing step to restore maximum clarity.
Follow with a polishing pad and a medium polish to remove compounding haze, then use a finishing pad/polish if needed for extra clarity. After correction, apply wax, sealant, or ceramic protection to lock in results.
Clean it after every section or two. Cleaning on the fly keeps the foam pores open, reduces dusting, and maintains a consistent cut from start to finish.






Leave a comment